A word of caution: taking apart your laptop will void your warranty. Do this operation at your own risk. If you are not comfortable doing this operation, I would recommend against it. Disassembling a laptop is harder than taking apart a desktop computer (mostly because of the confined space), so you shouldn’t do it if you didn’t “look into” atleast couple of desktops already!
You can see a high resolution of the images below by clicking on them.
Step 0: what tools you need – a long Philips (“cross”) screwdirever, preferably one with magnetic tip (but you can manage without it).
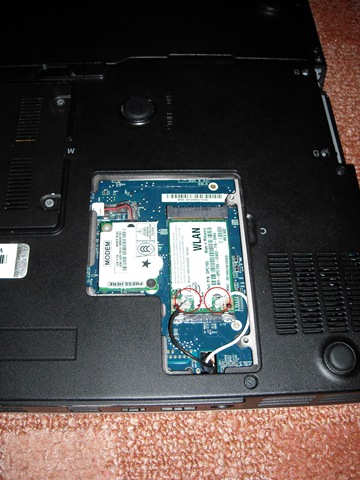
Step 1: disconnect the antenna from the wireless card. This is important, since it is connected to the LCD panel, which we need to remove. Do this by pulling carefully upwards on the connectors (not the wire). Don’t worry about knowing which wire goes where when reassembling, since it is clearly marked (with small white / black arrows).
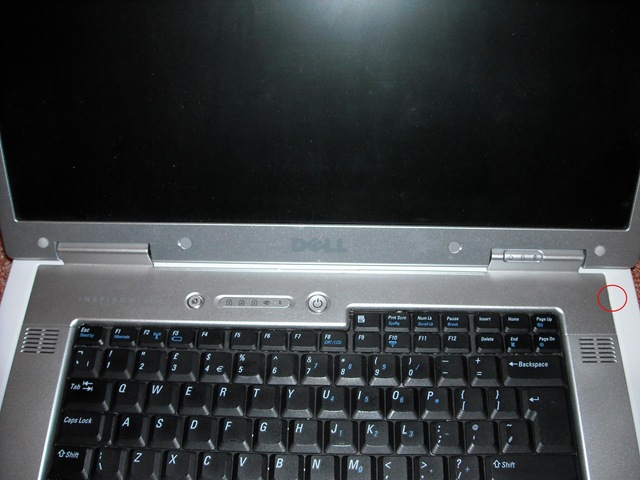
Step 2: tilt the screen all the way backwards (so that it is parallel with the bottom part) and remove the upper part of the cover. There is a small opening where the marking is on the image, you can start there. Carefully remove the whole cover. It has a couple of plastic “ears” which you have to be careful not to break.
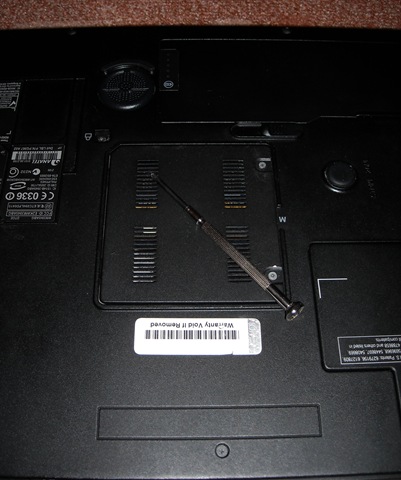
Step 3: remove the battery, hard drive, optical drive and bluetooth adapter. You eject the battery by sliding the middle lever. Remove the hard-disk by removing the two screws marked at the right. You can also remove the bluetooth adapter, which is near the harddisk. Sidenote: except the screws from the harddrive, you can distinguish the screws from the lower part and the upper part by their length. The rule is: lower part – long screws, upper part – short screws. To remove the optical drive, first remove the screw marked by a lock, and then push on he metal part with the screwdriver. This should pop it out just enough that you can pull on it.
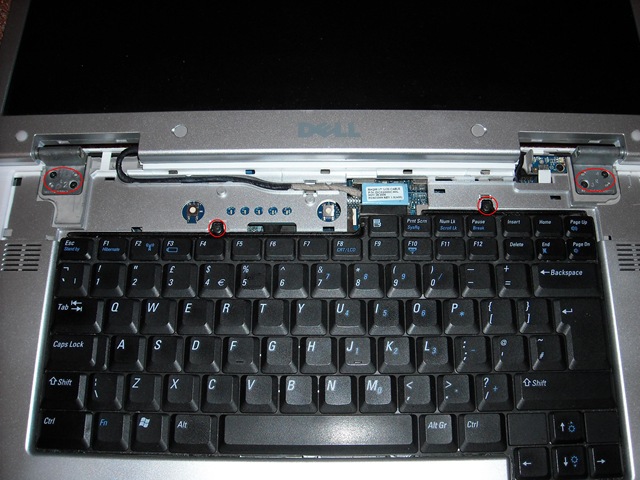
Step 4: remove the screws holding the screen and the two screws holding the keyboard.
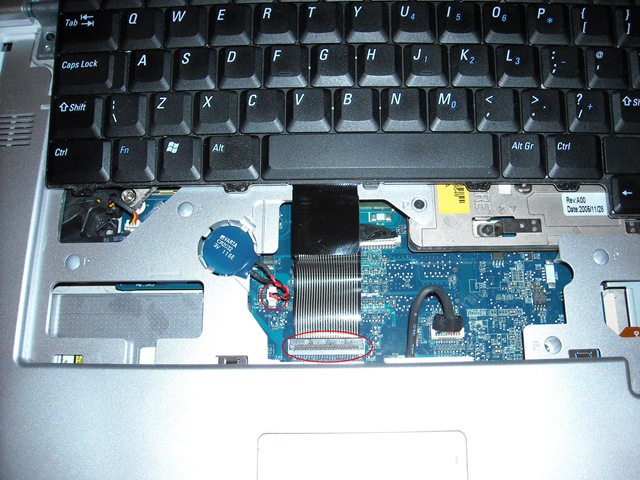
Step 5: disconnect the CMOS battery (this will result in you loosing your BIOS settings, which you will have to reset at the first boot after assembly). Also, disconnect the keyboard. This is a tricky connector: you have to flip the upper part open to remove the cable. Also, when putting it back, you first have to make sure that you’ve properly aligned the cable with the connector, and then push down on it. If it doesn’t go easy, don’t force it, rather take it out and try again, making sure that the alignment is correct (straight).
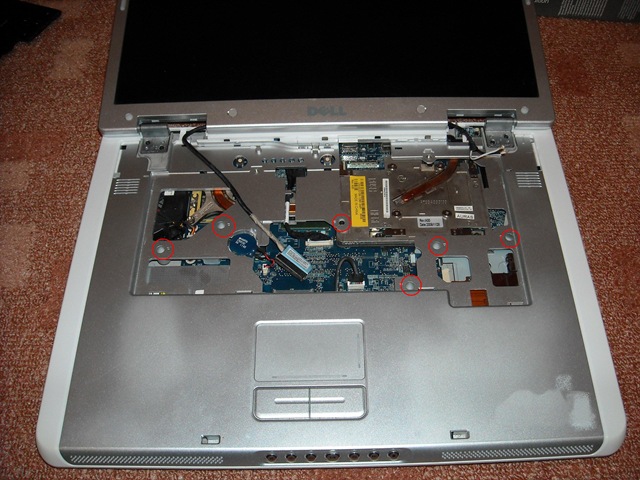
Step 6: disconnect the LCD panel and remove it. Unscrew the upper part, in the locations marked with “P”. Disconnect the two cables linking it to the mainboard (the ones towards the middle). Flip the base over and remove the bottom screws also. At this point you can separate the upper and lower part of the base.
Step 7: You can remove the PCMCIA adapter.
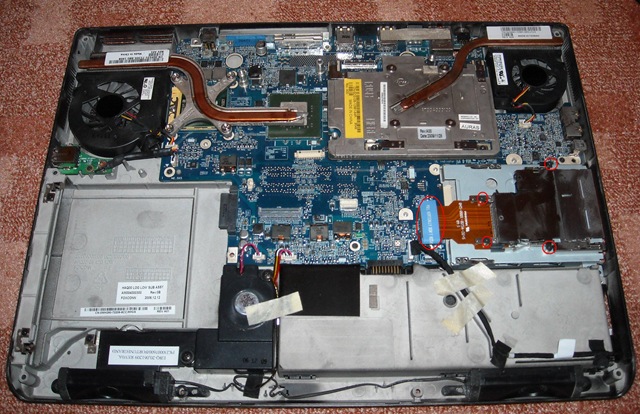
Step 8: The laptop is almost completely unassembled at this point. You can continue removing parts if you need to, however take care when working around the coolers: tightening them too much can result in the CPU/GPU cracking. Make them too loose however, and your cooling will suffer.
Happy hacking!


8 responses to “Taking apart the Dell Inspiron 9400”
Note: you can avoid voiding your warranty by getting a Dell certification in your particular make/model. Some Dell certs are free, some cost $$.
(http://support.dell.com/support/topics/global.aspx/support/dsn/en/document?c=us&cs=RC956904&dl=false&l=en&s=hied&docid=28BFFE56966D47FAA0F7D9D2026B6B71&doclang=en)
Thanks for the tip. The laptop was bought from a local second-hand shop which allows you to take stuff apart, so it wasn't a problem for me.
Great work detailing the spots that can actually be removed and taken out. I have this same laptop and was thinking about opening it up to clean it and whatnot..i'll definitely use this walkthrough.
Surprising how much of this post on a DELL laptop applies to other manufacturers. I checked the steps against a ACER 3610 and many of the steps apply directly. The rule on screw length is universal I think. I would add a caution on static electricity and suggest the use of ant-static wrist straps, since I have been burned on that before.
I was looking for this all over the net..I am having some problems with my monitor..the stand has become loose and keeps shaking. Is there anyways I can fix this..my warranty has expired.
http://www.b130.com had instructions for the monitor problem. I am not sure if it is still there as it looks like the site changed a lot
Hi!
I was planning to take my old Dell Inspiron 9400 and repurpose it for this: http://bluelinecity.com/projects/kitchenet/
Based on your experience in disassembling the display on this model, do you think it’s possible to mount it backwards for the purposes of the link above?
Thanks!
I'm not making any guarantees here :-), but yes, I think it would be possible and rather straight forward to mount the monitor backwards.